We garden here on a budget as we’ve quite a large garden at just under an acre & only so much spare dosh if I’m honest! We’re doing it ourselves, are still creating it & although gardens are always a work in progress, we’re still building the bones of ours. When we bought the place it was such a mess that needed dismantling & sorting out – here’s proof!
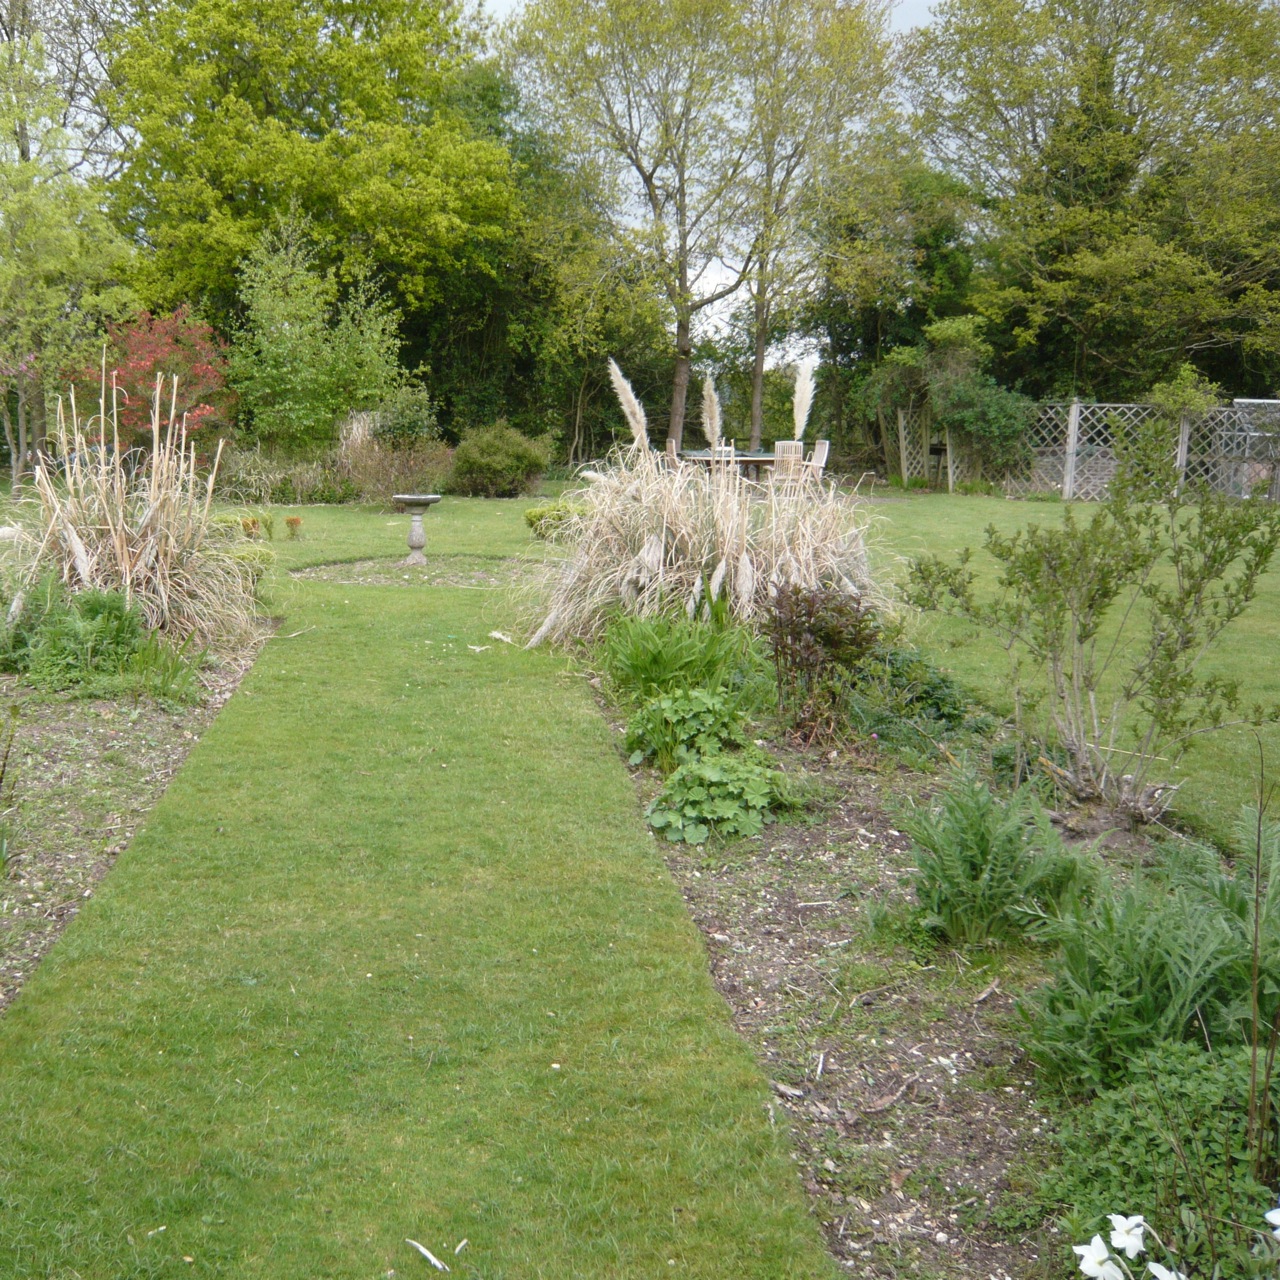
The garden we inherited!
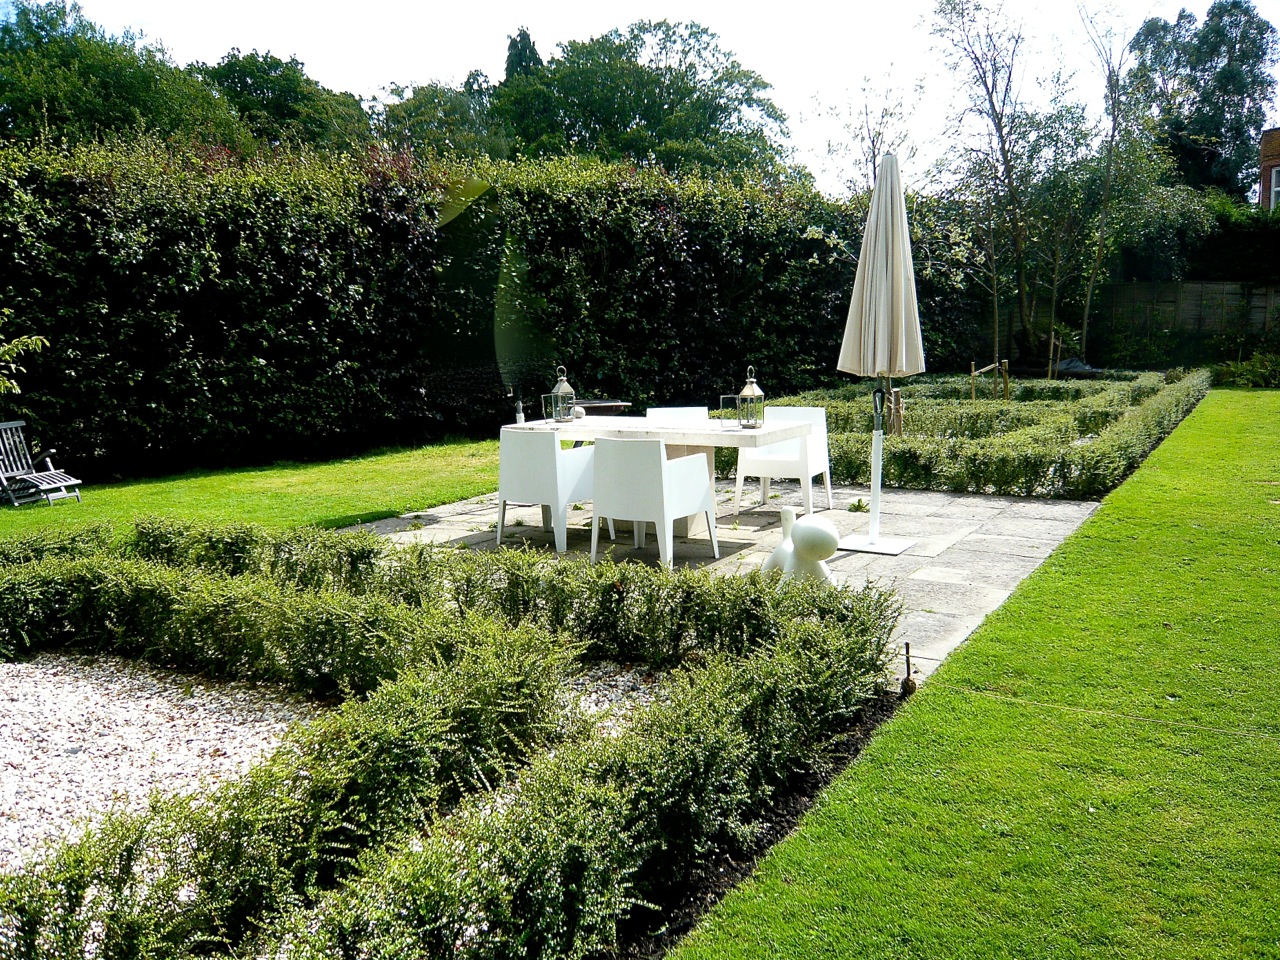
Agreed? I wanted to create a new terrace within the garden itself as the one we inherited was in completely the wrong position. It was at the bottom of the garden & under the oak trees. We reused all the faux York stone paving as it was so much more cost effective but in fact had aged so beautifully it was hard to tell it wasn’t the real thing. It would in all honesty have been madness to get rid of it. I’ve mentioned before we quite like recycling here – it seems to work very well although working out what goes where to make a square took me a ludicrous amount of time (it was originally a jagged oval). I cut out all the slab sizes & quantities in card (very Blue Peter!) as they were such peculiar sizes & shuffled them around a square to scale until I made the jigsaw fit. My husband & our handyman were awaiting my plan with bemused impatience as they had done all the prep work so fast.
-
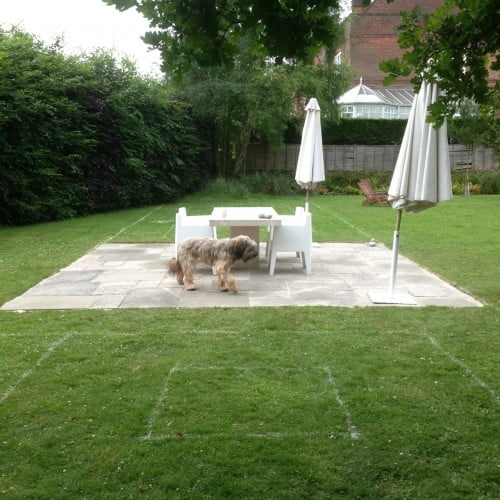
- Our lonely patio awaiting a parterre
-
- New patio & old can be seen here
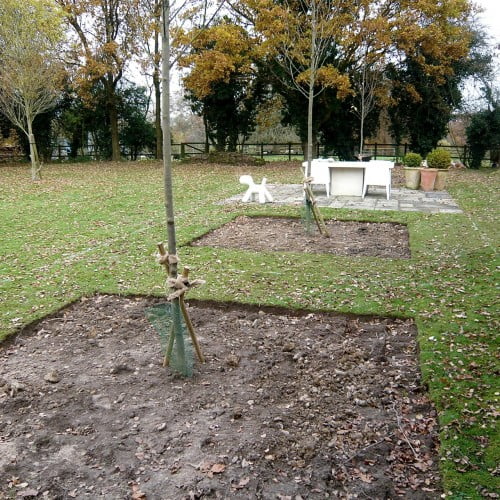
The new terrace was located in a blank part of the garden that happened to catch the last of the sun’s rays & made more of the garden as a whole. This portion of the garden had been given over to the previous owners kids so all we had done prior to this was clear away all the clutter (sandpits & sheds etc.) & lay lawn in the bare patches. We couldn’t afford to do it all in one go so we moved the patio over last summer & I simply marked out using spray paint where the parterre would eventually go.
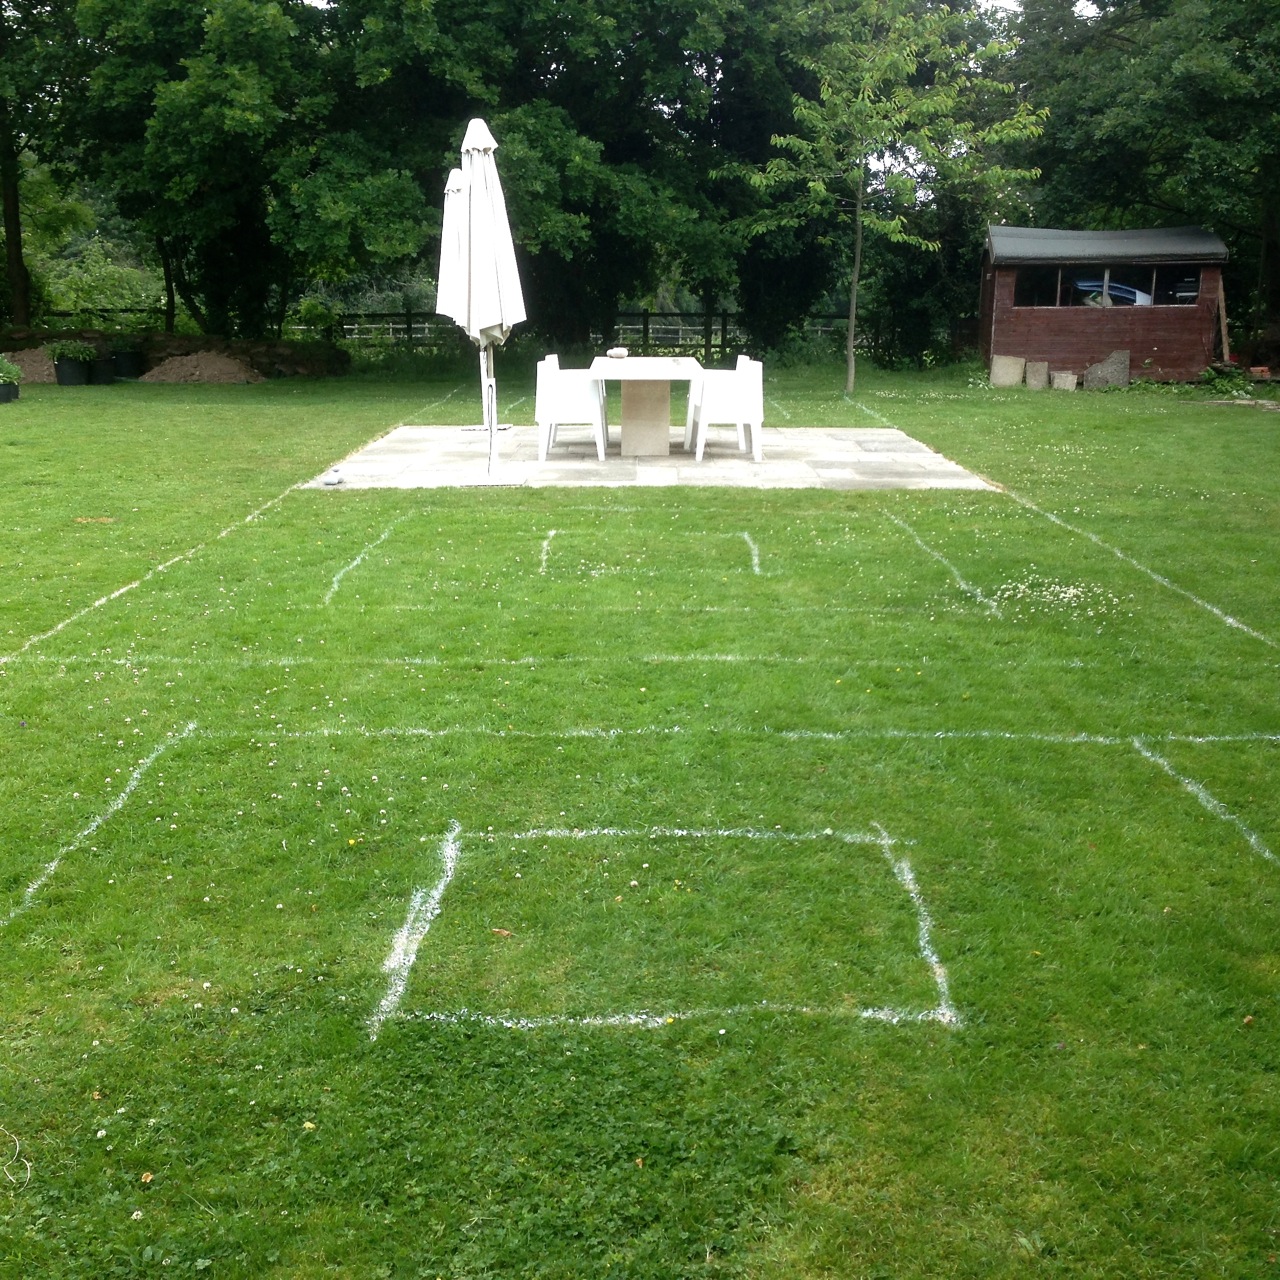
The sprayed out markings showed how it would work but in a short time they would disappear due to mowing & rain. I therefore cut out channels where the planting would go until we could afford to actually go ahead. Here’s the sequence of events –
-
- plant trees
-
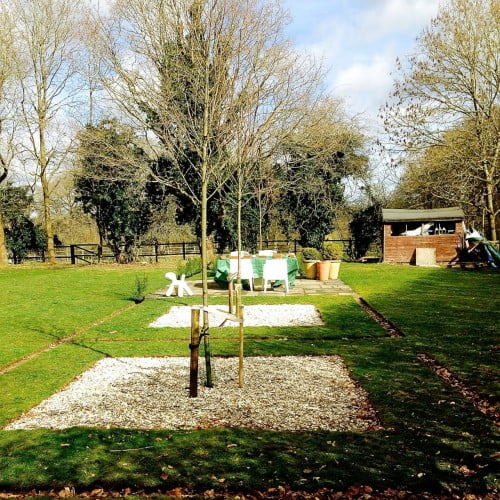
- local gravel with membrane beneath
-
- loniceras arrive!
-
- laying out the plants
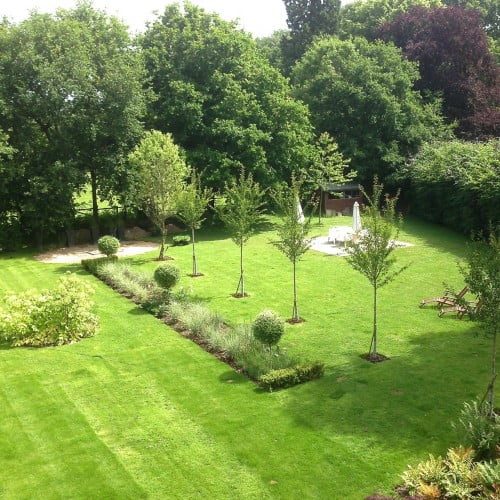
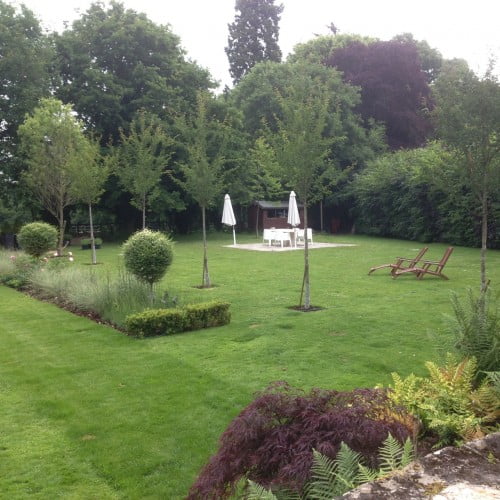
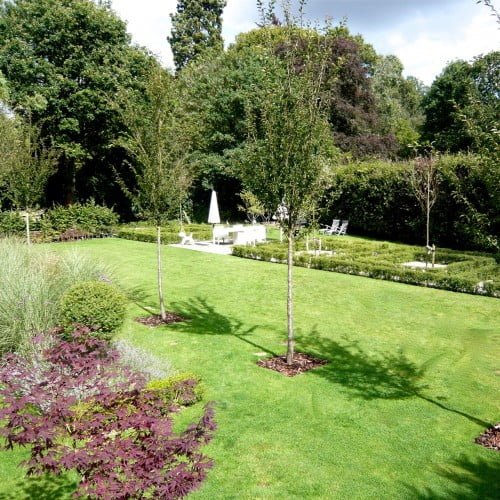
It was really starting to work & make the garden work as one – especially now the shed has been moved (see previous blog). If anything it seemed bigger & of course more interesting.
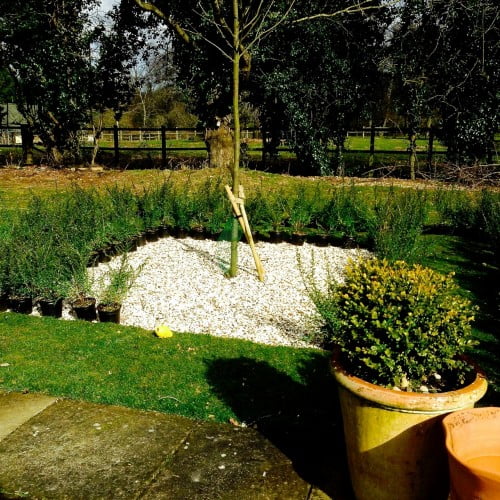
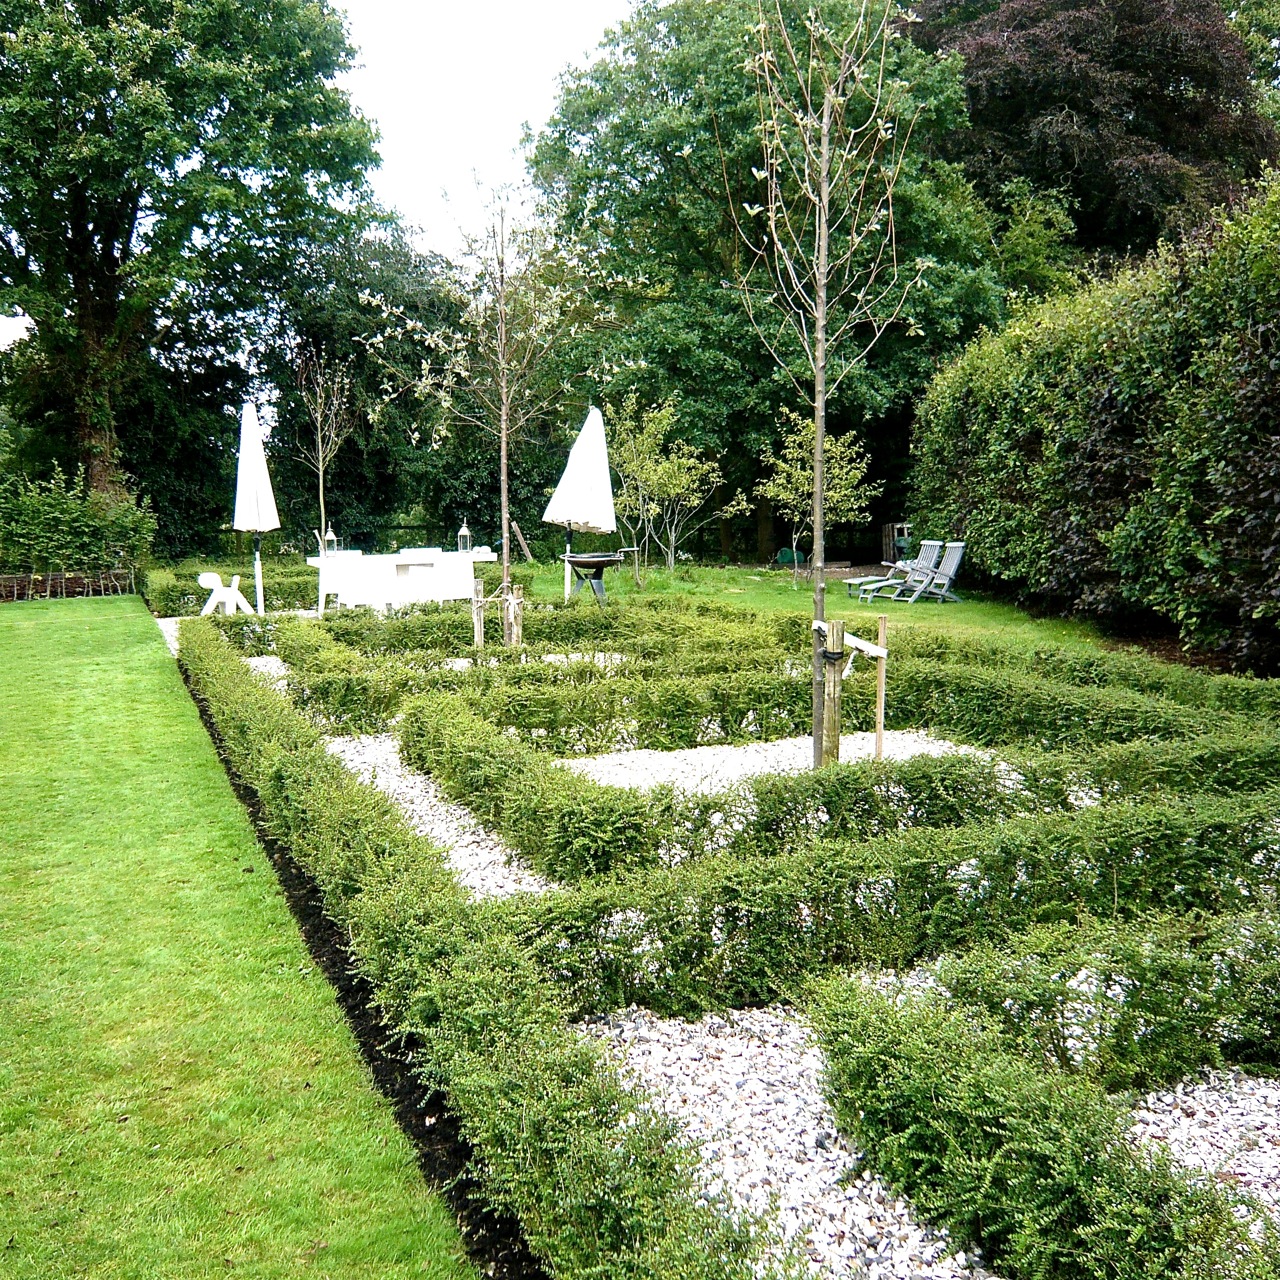 Here we are – almost done. I’ve used lonicera nitida as it is far cheaper & pretty much disease free unlike buxus sempervirens – box. I’ve never actually had problems with box blight but thought I’d give this a whirl for a change. It works incredibly well as it is so tough & fast growing but a warning to those thinking of doing the same – I have to clip it every two weeks at the moment as it just grows SO much! The trees are sorbus aria – whitebeams as I wanted something not only tough but a good contrast to the dark beech hedge on the boundary. They are struggling a bit surprisingly but I’m told by Hilliers that this species always take longer to establish so I’m taking their word for it.
-
- before
-
- after
So far so good. We’ve spent so many evenings out there BBQ’ing this summer & it has been much admired too. The next portion to tackle is the area between our new parterre & the hedge including where the shed used to live. So far we’ve planted 3 multistem amelanchiers which look stunning. I’m thinking a couple of apple trees might be nice too…I’ll have a think as I’m not completely decided yet. We’ve kept it simple & not had planting within the parterre as I like the architectural simplicity of it – something I’d seen at The Hempel in London but also filling these centres would cost so much in plants & time weeding it’s just a no no at the moment. I’ve so much work to do I don’t want to spend all my spare time gardening – I just like to sit & enjoy it so keep it simple & low maintenance. If you’re wondering I did use Everedge down the sides to prevent grass spreading into the lonicera & to keep the lines sharp.
All for now. Until next time!